How To Plan A Compact Laundry Setup With Better Drying Space
A practical step-by-step guide to how to plan a compact laundry setup with better drying space, including preparation, instructions, common issues, tips, and next steps.
How To Plan A Compact Laundry Setup With Better Drying Space
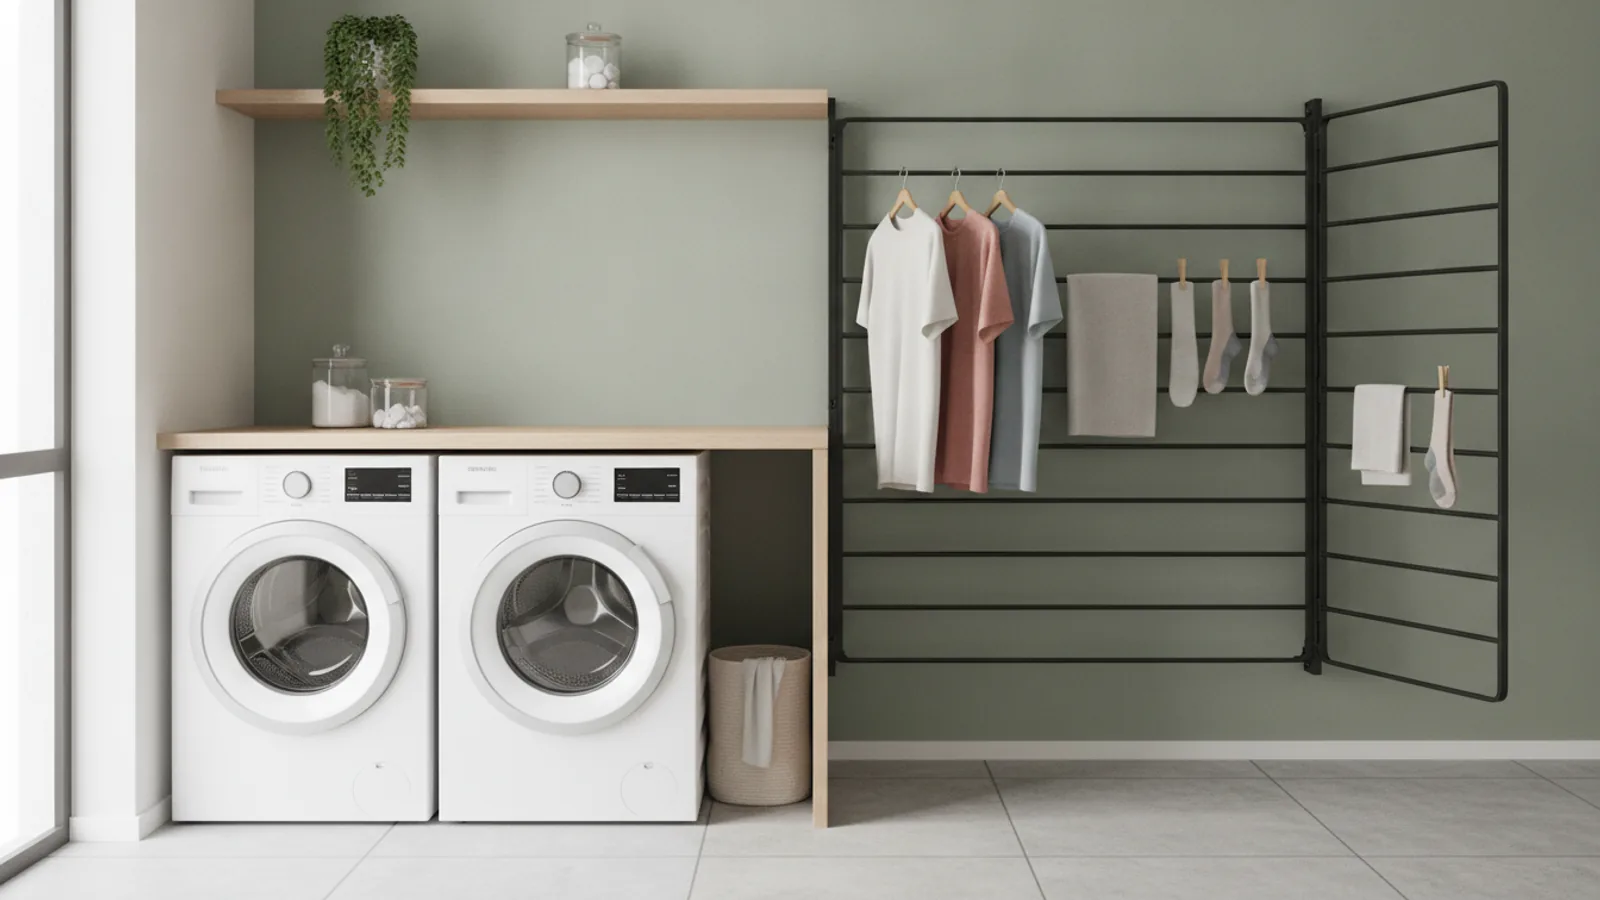
Planning a compact laundry setup with better drying space means thinking vertically and creatively. Use wall-mounted racks, retractable lines, and a small dehumidifier to speed drying. Prioritize airflow and organization so every inch works harder. This guide walks you through measuring, choosing equipment, arranging for maximum air circulation, and maintaining a routine that keeps laundry manageable in tight quarters.
Fast Answer
- Maximize vertical space with wall-mounted drying racks or a pulley clothesline that can be raised near the ceiling when not in use.
- Use a compact, foldable drying rack near a window or fan, and run a dehumidifier to shorten drying time significantly.
Before You Start
- Measure your laundry area including wall space, floor area, and ceiling height. Note door and window locations to plan airflow paths.
- Decide on a dedicated surface for folding and sorting, such as a wall-mounted drop-leaf table or a rolling cart that can be tucked away.
- Gather tools like a stud finder, drill, screws, anchors, a spirit level, and a tape measure for secure wall mounting.
- Consider moisture control options: a small dehumidifier, a fan, or a window vent to prevent mold and speed up drying.
Step-by-Step Instructions
Measure and Map the Space
Start by measuring the width, height, and depth of your laundry area. Use a tape measure to record the exact dimensions of walls, floor space, and ceiling height. Sketch a simple floor plan on paper or your phone. Mark doors, windows, and any existing fixtures like a washer, dryer, sink, or water heater, because they affect where you can place drying racks. Check for obstacles such as light switches or hallway traffic. Also note the location and direction of the nearest window, fan, or vent, as these will be your main airflow sources. Carry out this mapping before buying any equipment, so you choose items that fit precisely. This step prevents costly mistakes like a rack that is too wide or a line that blocks a door. It also helps you plan three zones: one for washing, one for drying, and one for folding. Once your map is ready, you can decide which wall has the most accessible space and best airflow for drying.
Choose Vertical Drying Systems
Prioritize drying racks that go upward instead of outward. Look for wall-mounted, foldable racks with multiple arms that can hold shirts, towels, and delicates. Alternatively, install a ceiling-mounted pulley clothesline, which lets you raise garments near the ceiling out of the way. When choosing, verify the weight capacity by reading the product label or manufacturer’s note; often it is printed on the packaging. Ensure the rack’s material suits moisture; stainless steel or coated aluminum resists rust, while plastic can warp. For small items like socks, choose a rack with clips or a compact over-door hanger. If you have a window, consider a foldable rack that stands over a basin or a portable rack that can be moved toward a fan. The goal is to use vertical space without making the room feel cramped. Measure the depth of the rack when open, because you need clearance for items to hang freely. Check that the mounting hardware is suitable for your wall type: use anchors for drywall and screws for wood.
Position for Maximum Airflow
Place drying racks near a window, an open door, or a fan to create cross-ventilation. Air movement is the single most important factor in drying clothes quickly because it carries moisture away from the fabric. Keep a gap of at least 15 cm between garments on a rack, so air can circulate between them. Point a fan toward the rack at low or medium speed if you don’t have a breeze. If the room is humid, run a dehumidifier in the same space, setting it to around 50% humidity. Avoid putting a rack in a corner where air is trapped, and never leave wet clothes sealed in a closet because that invites mildew. If using a clothesline, hang heavy items like towels at the ends where airflow is strongest, and lighter shirts in the middle. Rotate items occasionally to speed up drying, especially thicker fabrics. Also, open a window or use an extractor fan during and after machine use to remove moisture from the room.
Build a Folding and Sorting Station
Allocate a small countertop or a wall-mounted drop-leaf table for folding and sorting dry laundry. This station keeps you from using the drying area as a temporary table, which would disrupt airflow. Mount a foldable table at waist height to save floor space. Have a laundry sorter with three or four compartments: one for lights, darks, and delicates or a dedicated “hang to dry” bin. Place the sorter near the washer so you can sort as you go. Add a slim, rolling cart for supplies like detergent, stain remover, and clips. Keep a small basket or a mesh bag for delicates that need hand washing. The station should be within easy reach of the drying rack and the machine to reduce carrying. If you have a stacking washer-dryer, you might use a countertop on legs above the machines, but ensure it is sturdy. This step streamlines the laundry process, reduces clutter, and keeps wet clothes from piling up.
Optimize Drying Speed and Efficiency
Before hanging, give each garment a quick shake to reduce wrinkles and let air reach more fabric. Button shirts, unzip jeans, and turn pockets inside out to help moisture escape. Hang clothes with the heaviest parts down, like t-shirts from the hem, so water falls to the bottom and evaporates faster. Group similar fabrics together; thin cottons dry quicker than towels, so place them where airflow is best if needed. Use a spin-only cycle on your machine to extract as much water as possible before hanging, but check the fabric care label first. If space is limited, dry one load at a time instead of filling every rack, because overcrowding slows drying. Consider using a small hand-held dehumidifier if you don't have a full unit; it removes moisture directly from the air. Also, run a fan for at least 30 minutes after hanging to jump-start the process. These practices cut drying time and reduce energy use.
Maintain and Review the Setup
Once your compact laundry setup is in place, use it for a week and then evaluate what works and what doesn’t. Check that racks are stable and tighten any loose screws. Wipe down rods and shelves to remove dust or lint, which can slow drying and cause allergies. Adjust the position of racks if you notice clothes remain damp in certain spots; move them closer to the fan or window. Keep a record of which items dry hardest, such as jeans or heavy sweaters, and plan to give them extra time. Review your folding station to ensure it is still clear and functional. If you find you’re running out of space, consider a second retractable line or an over-door rack on a different door. Also, replace any rusted or broken clips promptly. A regular monthly check of your drying area prevents small issues from becoming bigger problems, and it helps you adapt as your laundry habits change.
Quick Reference
| Situation | Action | Why it helps |
|---|---|---|
| Your clothes take longer than a day to dry in a small, windowless room. | Run a dehumidifier near the rack and add a small fan pointed at the clothes, ensuring they have gaps between them. | Dehumidifiers remove water vapor from the air, and moving air carries moisture off fabric, together accelerating evaporation. |
| You have limited floor space but high ceilings that are unused. | Install a ceiling-mounted pulley clothesline and raise it when not in use to free up the area below. | Pulley lines use vertical space, keeping the floor clear and allowing clothes to hang high where warm air often rises. |
| You often fold clothes on the bed because you lack a dedicated surface. | Mount a wall-mounted drop-leaf table at waist height over the washer or near the dryer. | A foldable table gives you a stable surface for folding without taking up permanent floor space, keeping your routine efficient. |
Common Issues
- Clothes develop a musty smell even after drying overnight.: Ensure you have proper airflow by opening a window or running a fan. For persistent smells, wash a small load with white vinegar and allow extra drying time with wide spacing.
- Wall-mounted racks pull out of the wall or feel loose.: Remove the rack, patch the holes, and reinstall using appropriate hollow-wall anchors or screw into wooden studs with a stud finder.
- Drying racks are constantly in the way, blocking doorways or walking paths.: Attach racks to walls that fold flat when not in use, or use a portable rack that you can move to a clear wall after each load.
Advanced Tips
- Use a moisture-absorbing material like silica gel in a small hanging bag near the drying area; it can reduce humidity in a mini closet.
- Install a ceiling fan with a reverse setting that pushes air upward to mix the room’s air and reduce damp curls at floor level.
- Create a “drying schedule” that aligns with your daily routine, so you always have a time to turn garments for even drying.
Final Checklist
- Measure your space and record dimensions, including ceiling height and wall clearances.
- Install at least one vertical drying system, such as a wall rack or ceiling line, with proper wall anchors.
- Place a fan or dehumidifier near the drying area and keep a gap of 15 cm between items.
- Set up a folding station and review the setup after one week to adjust as needed.
FAQ
How can I dry clothes in a tiny apartment without a dryer?
Use a combination of a retractable clothesline over the bathtub and a foldable drying rack by a fan. Run a dehumidifier to lower humidity. Shake each garment, space them apart, and turn them once or twice to speed up drying. Always ventilate the room by opening a window or using an exhaust fan.
Should I put my drying rack near a heater?
Yes, but keep it at least 30 cm away to avoid fire risk and fabric damage. The dry heat helps, but beware of hot spots that can shrink or scorch fabrics. Instead, use a low-temperature heater with a fan to create warm airflow, and monitor items carefully.
Is it better to hang clothes outside or indoors for fast drying?
Outdoors is faster when it’s sunny and breezy, but if you lack outdoor space, indoors with a fan and low humidity is fine. Outside, choose a shaded spot to protect colors; indoors, target a room with good airflow or use a dehumidifier to mimic a dry, breezy day.