How To Choose A Small Living Room Lighting Update Without Rewiring
A practical step-by-step guide to how to choose a small living-room lighting update without rewiring, including preparation, instructions, common issues, tips, and next steps.
How To Choose A Small Living Room Lighting Update Without Rewiring
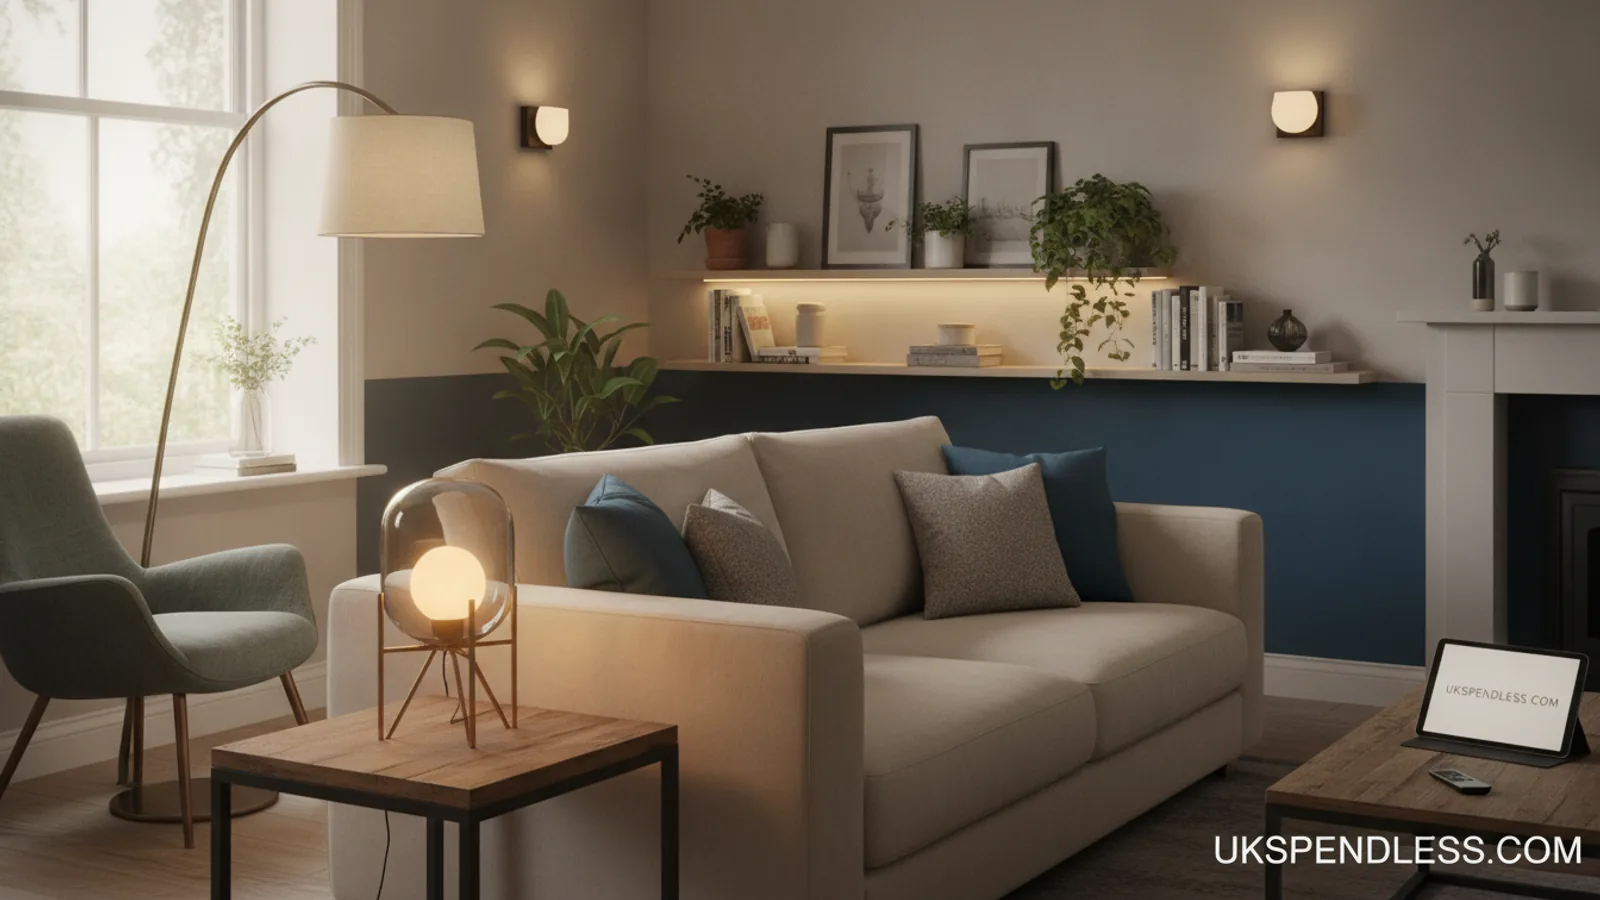
Upgrading your small living room's lighting usually feels like a big project, but you can refresh the entire mood without touching a single wire. This guide focuses on plug-in lamps, smart bulbs, and corded fixtures that simply connect to existing outlets, along with clever placement tricks to make the space feel brighter, larger, and more welcoming. You will learn how to layer different light sources, choose the right bulb temperature, and position fixtures to highlight your room's best features. Each step gives a clear action, a practical check, and why that check matters, so you can confidently transform your lighting in an afternoon. Whether you rent or just prefer a non-invasive upgrade, these solutions keep your walls intact and your switch box untouched.
Fast Answer
- Use plug-in wall sconces, floor lamps, and table lamps to add light without rewiring; simply plug them into existing outlets and use smart plugs for remote control.
- Swap existing bulbs to smart LED bulbs that adjust color temperature and brightness; then use the app to set scenes that mimic multiple light sources from a single fixture.
Before You Start
- Measure your living room's length and width in feet or meters so you can calculate the total lumens needed (roughly 30 lumens per square foot) and plan lamp placement.
- List every available outlet location, noting which are behind furniture, near seating, or along traffic paths; this determines where you can safely place plug-in fixtures.
- Inventory your current bulbs, checking each lamp's maximum wattage and base type, so you know which smart bulbs or LED replacements you can buy without adapters.
- Decide on the mood you want—bright and energetic, soft and cozy, or cool and focused—because this affects the color temperature (Kelvin) you will choose for each layer.
Step-by-Step Instructions
Create a Lighting Plan on Paper
Start by sketching your living room's floor plan on a simple grid, marking windows, doors, seating, and current outlets. Label each zone—reading corner, TV area, walkway, and accent wall—because each zone needs a different light role. Then write three layers: ambient (overall wash), task (focused light for reading or hobbies), and accent (for plants or art). For a small room, aim for at least two or three layers; too many fixtures can clutter, but too few leaves flat shadows. After drawing, count your available outlets and compare them to the number of lamps you plan to add. If a zone lacks a nearby outlet, you will need to use a lamp with a longer cord or a plug-in track system. This paper plan prevents you from buying fixtures that don't fit your layout, and it forces you to consider cord management before you shop. It also helps you visualize how light will spread, reducing the chance of creating dark corners or glaring hot spots.
Choose Plug-In Wall Sconces for Vertical Light
Plug-in wall sconces are the best way to add vertical light without wiring because they attach to the wall with brackets and plug into a low-profile outlet behind the fixture. Look for designs that have a built-in on/off switch on the cord, or use a smart plug for voice or app control. Place one sconce on either side of a mirror, above a console table, or beside a reading chair to create focused pools of light. Before installation, decide exactly where the sconce will hang and then locate the nearest outlet; if the outlet is not directly behind, you may need to use a cord hider or adhesive clips to route the cord neatly along the baseboard. Attach the mounting bracket with the included screws and anchors that suit your wall type (e.g., drywall or plaster). After hanging, test the cord length and make sure the switch is reachable. This step adds visual interest at eye level, drawing the eye upward and making the ceiling feel taller, which is key in a small room.
Layer with Floor Lamps in Corners
Place at least one floor lamp in a corner that feels dark, directing the shade upward for ambient light or downward for task lighting. A tall, slim torchiere floor lamp works well behind a sofa or armchair because it takes little floor space and sends light toward the ceiling. Before you buy, measure the height of your furniture and ceiling: the shade should sit above your head when you sit, typically around 60 to 70 inches from the floor. Look for a lamp with a dimmer switch or a three-way bulb that lets you adjust brightness. When placing, keep the lamp at least 12 inches away from curtains and furniture to avoid heat buildup, even with LED bulbs. After plugging in, turn it on and walk around the room to see if shadows fall across your face or if the light glare on a nearby TV. Adjust the shade angle or move the lamp until the beam covers the seating area without creating a hotspot on the floor. This step fills the middle of the room with soft, diffused light, eliminating cave-like darkness.
Use Table Lamps for Task Lighting
Position table lamps on end tables, sideboards, or floating shelves to provide direct light for reading, writing, or knitting. For a small living room, select compact lamps with a shade that directs light downward and has a switch on the socket or cord. Place a table lamp near a comfortable chair or the end of a sofa so you can easily reach the switch. Before finalizing placement, test the lamp's height: the bottom of the shade should be at eye level when you sit, usually 18 to 24 inches above the table surface. When you plug it in, use a smart plug if you want to control it from your phone or set a timer. Turn on the lamp and check that it lights your book or project without casting a shadow from your body; if you see a shadow, move the lamp to the opposite side. This step focuses light exactly where you need it, reducing eye strain and making reading relaxing instead of frustrating.
Accent with Plug-In LED Strips or Pucks
Use short plug-in LED strip lights or puck lights to spotlight architectural details like a bookshelf, a framed print, or a decorative tray. These come with adhesive backs and a simple AC adapter that plugs into an outlet. Before attaching, plan the path: decide if you want to run the strip under a shelf, behind a plant, or along a picture rail. Clean the surface with a dry cloth and peel the adhesive backing, pressing firmly for a few seconds. For pucks, screw or stick them in place depending on the model. Run the cord neatly to the outlet, using cable clips to hide it along the shelf's back edge. Once installed, plug in and test the light angle; the goal is to highlight the object, not to blind you when you walk by. If you want to create a soft glow, place strips facing upward against a wall. This step adds depth and makes your room look curated, drawing the eye to interesting surfaces and away from less attractive corners.
Incorporate Smart Plugs and Bulbs for Control
Finally, add smart plugs or smart bulbs to your existing lamps to control everything from your phone or voice, without any wiring. A smart plug screws into your wall outlet and then you plug your lamp into that plug; it simply supplies power on and off. A smart bulb replaces your current bulb and connects to your home's Wi-Fi or Bluetooth. When shopping, check the bulb's base type (E26 or E12) and its maximum wattage that your lamp supports. To install, screw the bulb in, then follow the app instructions to connect it—usually pressing a button on the bulb or scanning a code. For smart plugs, plug the lamp into the smart plug, plug the smart plug into the wall, then connect it to the app. After setup, test each device by turning it on and off through the app. Then create scenes: for example, a 'Movie' scene that dims all lights to 20% and a 'Reading' scene that turns on only the table lamp brighter over your chair. This step gives you instant flexibility and helps you save energy by scheduling lights to turn off when you leave.
Quick Reference
| Situation | Action | Why it helps |
|---|---|---|
| You want a reading light near an armchair but there's no floor outlet close enough. | Choose a small plug-in wall sconce and mount it on the wall directly above the chair; route the cord down to a nearby baseboard outlet using adhesive cord clips. | Wall sconces deliver light exactly where you need it without taking up floor space, and cord clips hide the wire along the wall, so you don't need to hire an electrician. |
| Your living room feels flat and dim despite a ceiling fixture, especially in the evenings. | Add a floor lamp in the darkest corner, then place a table lamp on a shelf at mid-height, and point a small LED strip behind a bookshelf to create a warm glow. | Layering three different light sources at different heights fills the room with soft, even light, making the space feel larger and more inviting than a single overhead light. |
| You want to control your lights without getting up, and you rent your apartment so you can't change wiring. | Install a smart plug in the outlet that powers your floor lamp and fit a smart bulb into your table lamp; then use the manufacturer's app or assistant to turn them on and off. | Smart plugs and bulbs are simple plug-and-play devices that replace a manual switch, giving you remote and voice control without altering your rental's permanent fixtures. |
Common Issues
- Lamp cords stretch across the walkway, creating a trip hazard.: Measure the distance from the fixture to the nearest outlet before buying; if the cord is too short, use a plug-in lamp with a longer literal cord or place a cord cover or floor cord protector against the baseboard. Always route cords around furniture legs instead of across open floor areas.
- The new smart bulb flickers or does not connect to the app.: Check that your Wi-Fi is on 2.4 GHz (most smart bulbs require this) and that the bulb is no more than 30 feet from the router. If the bulb still fails, remove it from the app, turn off the lamp switch, wait 10 seconds, then repeat the pairing process. Also ensure the lamp switch is in the ON position, because smart bulbs need constant power.
- The room looks dim even with multiple lamps, or the light is too harsh and glary.: Compare the total lumens of all your bulbs to the recommended 30 lumens per square foot. If you're below, upgrade to a higher-lumen LED bulb or add one more lamp. If the light is too harsh, switch to bulbs with a lower color temperature (2700–3000K) or use lampshades with a diffusing inner lining.
Advanced Tips
- Use a smart daylight sensor plug that automatically turns on a lamp at sunset, then turns it off at sunrise, to create a natural rhythm without touching any switch.
- Install a plug-in track lighting kit that attaches to a shelf or picture rail, giving you directional spotlights for plants or artwork without driving screws into your ceiling.
- Task your lamps with a single remote control that can control multiple smart plugs; this lets you create a single 'Living Room' scene button that toggles every light at once.
Final Checklist
- Verify that your total living room lumens meet the recommended level by adding up the lumens printed on each bulb's box.
- Walk through your room at night and confirm that every area has at least two light layers, and that no cords cross a walkway or door threshold.
- Test all smart controls by turning lights off and on from the app and voice assistant, and confirm the schedule works for both sunset and your chosen times.
- Check every bulb you installed to ensure it does not exceed the fixture's maximum wattage, and that all cords are securely tucked along baseboards.
FAQ
Can I really add lighting without drilling holes or running new wires?
Yes, but use plug-in fixtures like floor lamps, table lamps, and wall sconces that connect to existing outlets. For accent lighting, use self-adhesive LED strips and pucks that stick to shelves or furniture. The only exception is mounting sconces that require a few screws for the bracket, which is still much simpler than rewiring. Always check that your outlets are grounded and that you don't overload a single circuit with too many lamps.
What is the easiest way to control new lights without getting up?
Use smart plugs for your existing lamps and smart bulbs for fixtures with a standard base. After installing, you control them through a mobile app or a voice assistant. You can also create schedules and scenes that adjust brightness automatically. Just make sure your Wi-Fi is stable and you follow the pairing instructions exactly, including keeping the lamp switch in the ON position while pairing.
How do I know if I'm buying the right bulb for my lamp?
Before purchasing, look for the maximum wattage label on the lamp's socket or base (often printed on a sticker). Choose an LED bulb with the same base type (such as E26 or E12) and a wattage equal to or less than the maximum, even though LED bulbs use far less actual power. Also consider the color temperature: 2700K gives a warm glow ideal for relaxing, while 3000K is a bit brighter and works for tasks. You can always bring the lamp's label to the store or shop online with that specification in hand.