How To Choose A Compact Laundry Setup With Better Drying Space
A practical step-by-step guide to how to choose a compact laundry setup with better drying space, including preparation, instructions, common issues, tips, and next steps.
How To Choose A Compact Laundry Setup With Better Drying Space
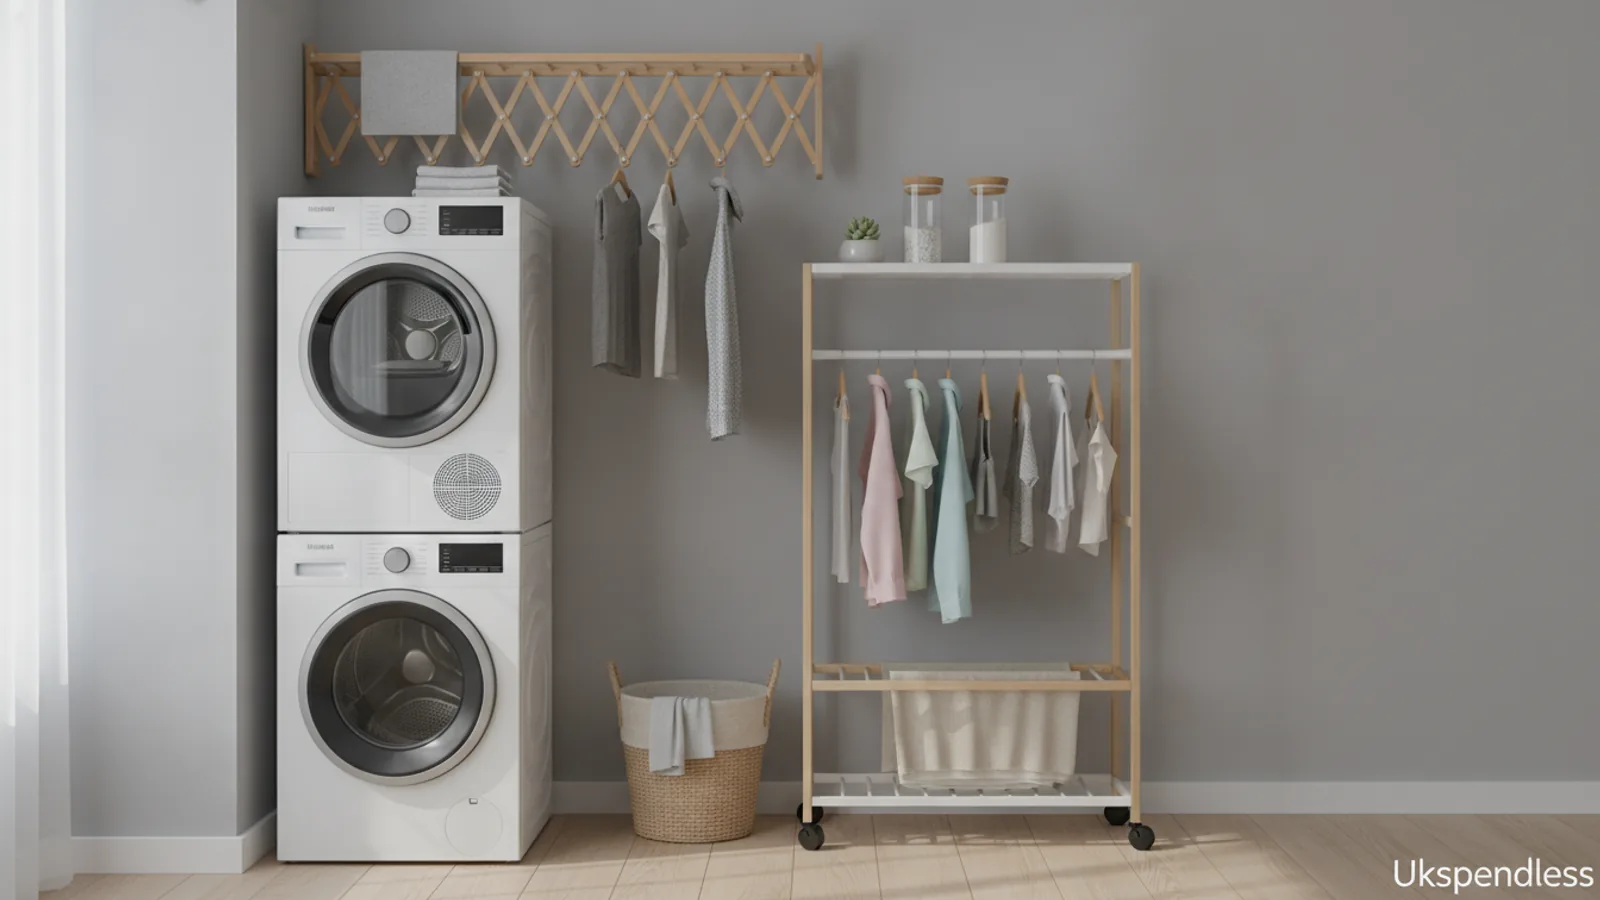
Choosing a compact laundry setup with better drying space is about balancing machine size, venting options, and creative use of vertical and foldable drying aids. This guide helps you measure your space, compare dryer types, and arrange your laundry area to speed up drying and avoid dampness, even in small homes.
Fast Answer
- Measure your available floor and wall space first, then choose a combined washer-dryer or a stackable pair that fits with clearance for airflow. Prioritize vented or ventless options that suit your home's existing hookups.
- Maximize drying space by adding a retractable clothesline, a foldable drying rack, and using wall-mounted racks to catch dripping garments, while keeping the area around the dryer clear for hot air to escape.
Before You Start
- Clear the area where you plan to put the laundry setup, and measure the width, depth, and height of the space including any doors or cabinets that may open into it. Write down these numbers on paper for reference.
- Check your current laundry connections such as water valves, a drain pipe, and a dedicated electrical outlet. Note the type of outlet and whether it can handle the power needs of a dryer.
- Look at your home's ventilation options: a ventless dryer condenser system works without outside ducting, while a vented dryer needs an exterior vent. Decide which is possible and which you prefer.
- Decide how much drying space you need beyond the machine itself, such as for delicates or large items. Think about where you can hang clothes nearby, like in a bathroom or a walk-in closet.
Step-by-Step Instructions
Measure Your Space and Access
Start by measuring the exact width, depth, and height of the area where you plan to place your laundry setup. Include any door trim, baseboards, or nearby fixtures that could reduce usable space. Also measure the width of doorways and hallways along the path from the front door to the laundry spot, because you need to move the machine in without disassembling walls. Check the floor level with a spirit level; an uneven floor can cause vibration and noise. If your space includes an upper cabinet, note its height so you can choose a front-load washer that fits under it with room to open the door fully. This step matters because you cannot return an oversized machine easily, and a machine that does not fit is dangerous and wasteful. Write all measurements on a notepad and keep them beside you when comparing options, so you never guess or rely on memory.
Decide Between a Combo Unit and a Stacked Pair
Now that you know your space, choose between a single combined washer-dryer unit and a stacked pair of a separate washer and dryer. A combo unit takes less width but often has a smaller drying capacity and needs longer drying cycles. A stacked pair uses vertical space and typically dries faster and holds more clothes, but it requires more height and a sturdy base to secure the top dryer. If your ceiling is low, a stacked pair may not work. If you have a wide but short space, a combo unit is more practical. Consider how often you do laundry and how much you dry at once: a family needs a larger dryer than a single person. Also think about the door opening: front-loading machines allow easier loading but need more floor space in front, whereas top-loading machines need clearance above. This choice affects every aspect of your daily routine, so it deserves careful thought.
Select the Drying Technology That Suits Your Home
The main drying technologies are vented, vented-with-condenser, and heat-pump types. Vented dryers expel moist air through a hose to the outside, so they need an exterior vent nearby. Ventless condenser dryers collect moisture in a tank or drain it into a sink, giving you more placement freedom. Heat-pump dryers are a type of condenser that uses cooler temperatures, which is gentler on fabrics but costs more upfront. If you live in an apartment without outside access, a ventless condenser is your best choice. If you have an exterior wall, a vented dryer is efficient and often cheaper to run. Check whether your home already has a dryervent and if it is clean, because a blocked vent causes slow drying and safety issues. Consider the humidity in your area: ventless dryers can raise room humidity, so you need ample ventilation around the machine. Choose the technology based on your actual hookups and your comfort with routine maintenance.
Plan for Water and Drainage
Your washer needs a water supply with both hot and cold valves, and a drain pipe or standpipe that can handle the discharge. A condenser dryer also needs a place to discard collected water, either a drain hose or a removable tank you empty manually. Check whether the existing plumbing is fitted with standard connectors, and note the distance from the machine's back to the water valves and drain. If you use a dryer that requires a drain, plan a hose route that allows a gentle slope so water flows easily. If you have to extend hoses, make sure you buy the correct length and type recommended in the manual. Also consider a washing machine pan under the unit to catch leaks, which protects your floor from damage. This planning prevents water damage and ensures the machine drains quickly, avoiding standing water that can cause odors and mildew.
Arrange Extra Drying Space Nearby
Even the best dryer cannot handle everything; delicates, shoes, or line-dry-only clothes need space to air dry. Look for a wall or door in the laundry area where you can install a foldable drying rack that swings out when needed and folds flat when not. Also consider a retractable clothesline across a bathtub or balcony, but make sure it is attached to sturdy supports. If your laundry room has a shower rod or a closet rod at a convenient height, use it for hanging shirts or dresses on non-slip hangers. A separate foldable rack with multiple tiers can sit in front of a dehumidifier or fan to speed up drying. Ensure your chosen racks do not block doorways or vents, and leave enough space between garments for air to circulate. Having a dedicated drying spot reduces wear on your dryer and shortens its running time.
Set Up a Routine to Maximize Drying Efficiency
After installation, adopt a routine that makes drying faster and more energy-efficient. Always check the lint filter in the dryer before every load and clean it thoroughly, because a clogged filter blocks airflow and lengthens drying time. Separate heavy items like towels from light clothing to even out drying. Use the correct load size; overloading prevents clothes from tumbling freely, while underloading wastes energy. If your dryer has a moisture sensor, use the 'auto dry' setting instead of a timed cycle, as it stops when clothes are dry. For line-dried items, shake them well before hanging and place them with enough space between pieces. In humid weather, run a dehumidifier in the laundry room while drying to pull moisture from the air. These habits cut down on drying time, reduce utility bills, and keep your clothes smelling fresh. A consistent routine also helps you notice any change in machine performance early.
Quick Reference
| Situation | Action | Why it helps |
|---|---|---|
| Your laundry alcove is only 60 centimeters wide and you have a low ceiling. | Measure the exact height and choose a ventless all-in-one washer-dryer that fits under a standard cabinet, and confirm you can open the door fully in that width. | A single combo unit uses floor width more efficiently than a stacked pair, and ventless operation avoids the need for exterior ducting, which is often missing in tight spaces. |
| You have a spare closet near a bathroom but no outside wall for a dryer vent. | Select a condenser or heat-pump dryer that drains into a sink or a dedicated drain pipe inside the closet, and leave a 5-centimeter gap around the unit for airflow. | Ventless dryers do not require an exterior vent, so they can be placed almost anywhere, as long as you manage the collected moisture and provide adequate air circulation. |
| You have a very small apartment and no space for a separate drying rack. | Install a retractable clothesline above your bathtub or shower, and use a foldable wall-mounted drying rack that drops down when needed and folds flat against the wall. | Vertical and collapsible solutions use otherwise empty air space, and they tuck away when not in use, preserving your limited floor area for daily living. |
Common Issues
- Clothes remain damp after a drying cycle.: Clean the lint filter and check the exhaust vent or condenser unit for blockages. Reduce the load size and choose a longer or 'auto dry' cycle. Make sure the dryer is on a level floor and the room is not too humid.
- Dryer takes a long time to dry a load.: Check that the vent hose is not kinked or too long, and clear any lint buildup. For ventless models, clean the condenser filter regularly. Also, avoid overloading and separate heavyweight items from lightweight ones so the tumbling action works efficiently.
- Condenser dryer leaves water in the collection tank very quickly.: If your dryer has a drain hose, ensure it is correctly connected to a standpipe or sink, and the hose is not deformed. If using a tank, empty it after each load and check that the tank sits properly. Reduce room humidity by opening a window slightly while drying.
Advanced Tips
- Install a small exhaust fan in the laundry room to actively pull moist air outside, which greatly accelerates line drying and reduces humidity that can make clothes feel damp.
- Use a drying rack that hooks over a door or cabinet to take advantage of vertical space without fastening anything to walls, which is ideal for renters who cannot drill.
- If you already have a washer and dryer, consider adding a heat-pump dehumidifier that collects water in a tank; it can cut drying time for racks and reduce overall moisture in a enclosed laundry area.
Final Checklist
- Verify that the machine's width, depth, and height fit your measured space, and that the floor is level.
- Check that you have the correct electrical supply and water connections, and that a dryer vent is clean and unblocked if using a vented model.
- Ensure you have at least one of these extra drying aids installed: a retractable line, a foldable rack, or a wall-mounted rack, with space to hang clothes.
- Before completing, run a test load to check for leaks and confirm the dryer reaches a low moisture level, then clean the lint filter to prepare for daily use.
FAQ
Can I place a ventless dryer anywhere without any special venting?
A ventless condenser dryer does not need an outside vent, but it still requires proper clearance around its sides and top for airflow. You should place it near a wall outlet and have a way to drain the collected water, either into a sink or an internal tank you empty. The room should have adequate ventilation to prevent humidity from building up, so avoid tight closed cabinets without any air circulation.
How much drying space do I need beyond the machine for air-drying clothes?
For a typical household, plan at least a retractable clothesline of 2 meters or a foldable rack with at least four tiers. This allows you to dry one full load of delicates or line-dry-only items. You should have enough space to hang clothes without them touching walls or each other, because good airflow around each garment is necessary for even drying. If you often have larger items like sheets, add a wall-mounted rack or a second folding rack.
What is the best way to dry clothes inside a small apartment without a dryer?
The best approach is to combine multiple drying aids: use a foldable rack near a window or fan to speed up evaporation, and use a retractable line above the bathtub for larger items. Run a dehumidifier to lower the indoor humidity, which helps clothes dry faster and prevents a musty smell. Also, wring out clothes thoroughly before hanging, and space items out with enough gaps. These methods work well in a compact space and do not require any permanent installation.