Common Mistakes When Planning A Small Living Room Lighting Update Without Rewiring
A practical step-by-step guide to common mistakes when planning a small living-room lighting update without rewiring, including preparation, instructions, common issues, tips, and next steps.
Common Mistakes When Planning A Small Living Room Lighting Update Without Rewiring
Planning a lighting update for a small living room without rewiring can be a smart, cost-effective way to improve ambiance and functionality. This guide outlines common mistakes people make during the planning phase and provides practical steps to avoid them, ensuring a smooth, safe, and satisfying result. From measuring and choosing the right fixtures to managing light layering and smart controls, you'll learn how to create a well-lit, inviting space without touching existing wiring.
Fast Answer
- Start by measuring your room and noting the location of existing outlets and wall switches. This helps you choose plug-in fixtures and determines whether you need extension cords or power strips.
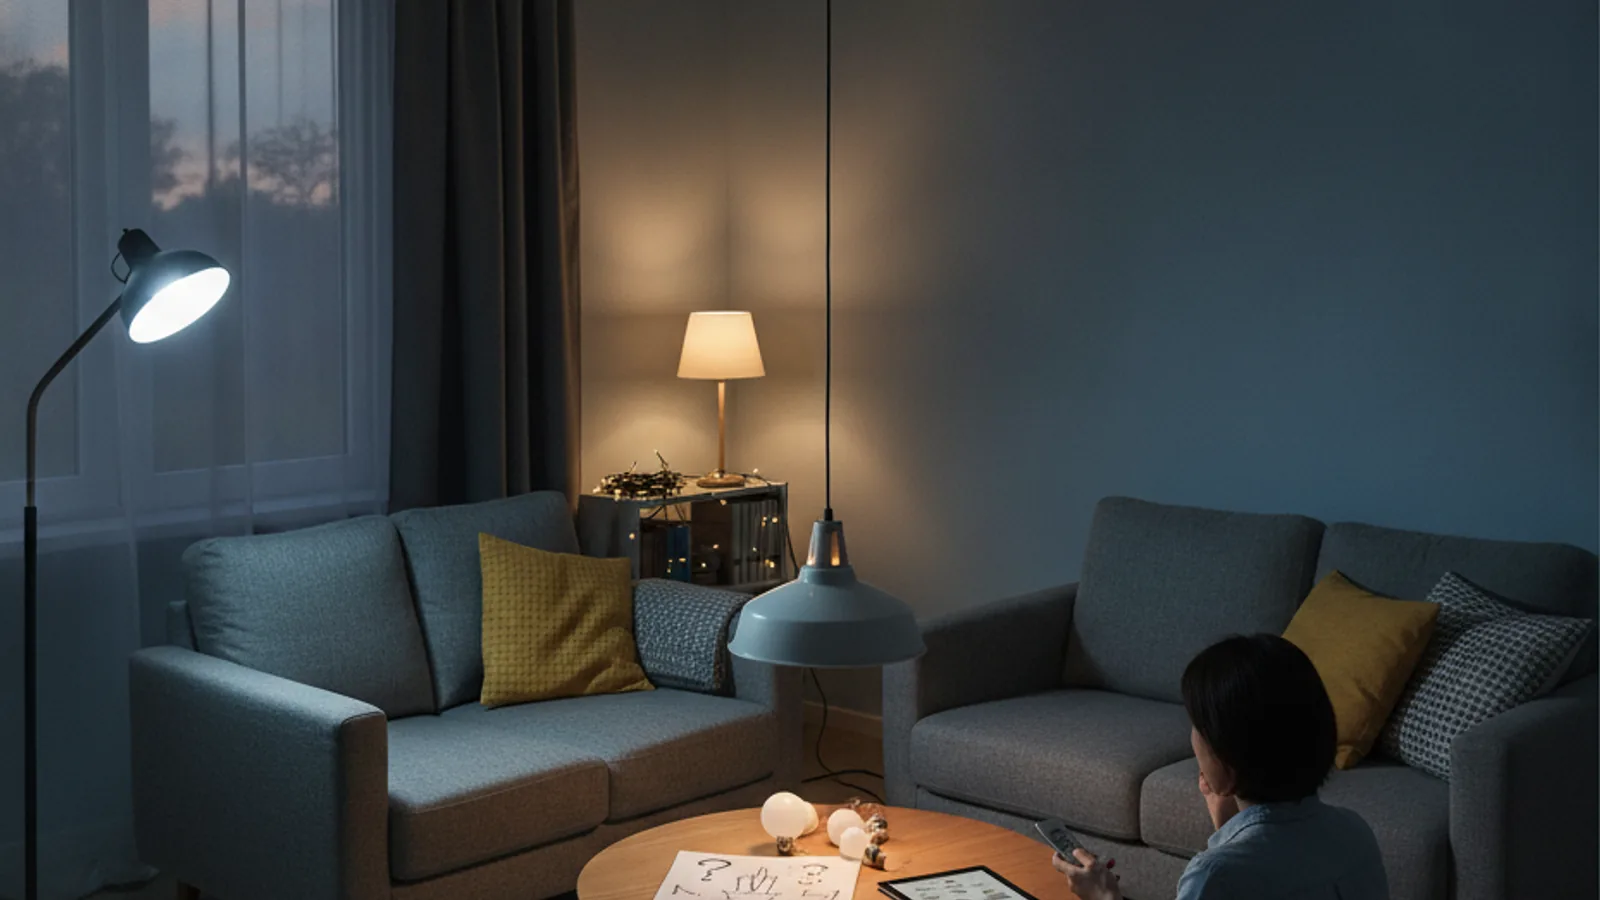
- Focus on layering three types of light: ambient, task, and accent. Use floor lamps, table lamps, and plug-in wall sconces to achieve balanced illumination without adding new wiring.
Before You Start
- Measure the room's length and width, and sketch a rough floor plan to visualize where furniture and light fixtures will go. Note the height of the ceiling and any low areas where corded fixtures might be in the way.
- List every existing electrical outlet and wall switch, noting their location and what they currently control. This helps you decide which fixtures can be plugged in and whether you need to rearrange furniture to reach outlets.
- Take a photo of the room from several angles, including the ceiling and walls, to use as a reference when selecting fixtures and planning the lighting layout. This also helps you visualize how different lights will interact.
- Decide on the primary activities in the room, such as reading, watching TV, or entertaining, and think about the mood you want to create. This guides your choice of brightness (lumens) and color temperature (warm or cool light).
Step-by-Step Instructions
Define Your Lighting Needs and Goals
Begin by writing down every activity that happens in your living room: reading, watching television, working on a laptop, playing games, or hosting guests. For each activity, note the level of light you need—bright for reading, dim for TV, and medium for socializing. Also, consider the mood you want: warm and cozy, bright and energetic, or calm and restful. This list will guide your choices for bulb brightness (measured in lumens) and color temperature (measured in kelvins). Warm light (2700K-3000K) feels cozy, while cool light (3500K-5000K) feels more energetic. A practical check: stand in the room and imagine the light during different times of day. For example, if you read for an hour each evening, you'll need a focused task light that can be positioned over your shoulder. This step matters because buying lights without a plan often leads to either a dim, gloomy room or a glaring, uninviting space. By defining your needs, you create a target for every purchase and avoid impulse buys that don't serve a purpose.
Measure Your Space and Map Out Outlets
Use a tape measure to record the room's length and width, then draw a floor plan on graph paper or a digital app. Mark the location of every window, door, and permanent fixture like a fireplace. Next, locate all electrical outlets and wall switches, noting which outlets are controlled by a wall switch (you can test by plugging in a lamp and flipping each switch). Also, note the height of the outlets from the floor, as this affects how long cords need to be. Measure the distance from each potential furniture placement to the nearest outlet, because you'll need to route cords safely along walls or under rugs—never over doorways or in high-traffic paths. A practical check: for each outlet, estimate how many devices you'll plug into it and whether a power strip is needed. This matters because knowing your outlet locations prevents you from buying fixtures with cords that are too short, which would force you to use extension cords that can become trip hazards or overheat if overloaded. Proper measurement also ensures that your light placement actually illuinates the intended areas without creating dark corners.
Choose Plug-In Fixtures That Suit Your Style
Now that you have a plan, start selecting fixtures that plug into an outlet rather than needing hardwiring. Look for floor lamps, table lamps, plug-in wall sconces, plug-in pendant lights, and even strip lights that plug in. When choosing, pay attention to the shade and finish: a metal shade reflects light downward, good for task lighting; a fabric shade diffuses light, good for ambient glow. Consider the scale: a large floor lamp can dwarf a small room, while a tiny table lamp may get lost. A practical check: measure the height of your furniture and ceiling to ensure the lamp's height is proportionate. For example, a floor lamp should be tall enough so that its shade is at or above eye level when you're sitting. This matters because the style and scale of your fixtures affect both aesthetics and function. A well-chosen fixture become a design element, while a poorly scaled one can make the room feel cluttered or unbalanced. Also, ensure that any wall-mount plug-in sconce is placed near an outlet and that you can run the cord discreetly, perhaps along a seam or behind furniture.
Create a Lighting Diagram for Layering
Using your floor plan, sketch where each light will be placed, ensuring you have three layers: ambient (general illumination), task (for specific activities), and accent (to highlight features like art or plants). For ambient, use a combination of ceiling fixtures that plug in (like plug-in track lights) or multiple lamps spaced evenly. For task, position a lamp near your reading chair or desk. For accent, aim a plug-in picture light or a small spotlight at a wall display. A practical check: for each layer, ask "Does this light serve a clear purpose?" and "Is there any area in the room that remains dark?" For example, if you have a dark corner, add a floor lamp with an upward shade to bounce light off the ceiling. This matters because layering prevents reliance on one overhead light, which can create harsh shadows and make the room feel flat. By planning the placement, you ensure that the light arrives where you need it and that the room feels inviting and functional. It also helps you avoid buying too many fixtures and overloading outlets.
Plan Outlet and Cord Management
Since you're not rewiring, you'll need to safely route cords from each fixture to an outlet. Examine your floor plan and decide the path for each cord: along the baseboard, under area rugs, or behind furniture. Use cord covers or cable sleeves to keep cords neat and protect them from foot traffic. If you need to use a power strip, choose one with a built-in surge protector and place it where it won't be covered by rugs or furniture. A practical check: for each cord, ensure that it lies flat against the wall or floor without bending sharply at the plug, and that it doesn't cross any walkway. Also, verify that you're not exceeding the recommended wattage for the outlet by adding up the wattage of all plugged lights. This matters because tripping hazards and electrical overloads are two common accidents that happen during lighting updates. Proper cord management not only looks better but also keeps your home safe. If you have a cord that must cross an open rug, use a cord cover that is specifically designed for floors, and tape it down securely.
Test and Adjust Your Lighting Setup
Once your fixtures arrive, set them up according to your diagram and plug them in. Turn on each light individually and observe the effect at different times of day. Check for glare, shadows, and dark corners. If a light is too bright, consider using a dimmer plug (a plug-in dimmer that connects between the lamp and outlet) or changing to a lower-wattage bulb. If a light is too dim, try a brighter bulb or add another fixture. A practical check: sit in your usual spots and perform typical activities like reading or watching TV. Does the light cause discomfort? Are there reflections on the TV screen? Adjust the position or angle of lamps accordingly. This matters because lighting is not about "set and forget"—it's about fine-tuning to match your actual use and comfort. You might find that a light that looks good from a standing position is terrible when you're seated. By testing and adjusting, you ensure that the final setup meets your needs and that you don't waste money on fixtures that don't work well.
Quick Reference
| Situation | Action | Why it helps |
|---|---|---|
| Your new floor lamp seems too dim for reading. | Replace the bulb with one that has a higher lumen count (e.g., 800-1100 lumens) and uses the same base type. Aim the lamp so the shade is at your shoulder height and light falls directly on the page. | Higher lumens provide more light intensity, which is essential for close tasks. Proper positioning ensures the light reaches the page without causing shadows from your hands. |
| You have too many lights plugged into one outlet using a power strip. | Unplug some lights and move them to a different outlet. Add up the wattage of each light and ensure the total is less than the outlet's max (typically 15 amps or 1800 watts). If in doubt, use a separate outlet. | Overloading an outlet can trip circuit breakers or cause overheating, which is a fire hazard. Spreading the load reduces risk and keeps your lighting reliable. |
| A cord runs across the middle of the room where people walk. | Use a floor cord cover (a low-profile channel that sticks to the floor) or reposition the lamp so the cord runs along the wall or under a rug. If you must have the cord cross the walkway, use a heavy-duty cord protector. | Cords on the floor are a trip hazard and can become damaged, leading to electrical shorts. Managing cords reduces injury risk and keeps your space safe and tidy. |
Common Issues
- I bought lights that are too large for my small room, making the space feel cramped.: Before buying, measure the room's dimensions and compare with the fixture's size. A good rule: a floor lamp should be roughly half the height of the ceiling. Choose slim designs, and opt for wall-mounted or table lamps instead of bulky floor lamps.
- All my lights are on one switch, so I can't turn them on individually, and I have to get up to adjust brightness.: Use smart plugs or plug-in dimmers for each fixture. That way, you can control each light with a remote or smartphone app. Alternatively, install a plug-in lamp controller that fits between the lamp plug and the outlet, giving you a manual switch at the fixture.
- I placed a lamp in a corner, but it creates a glare on the TV screen.: Move the lamp to the side of the TV, not directly in front or behind. Use a floor lamp with a shade that directs light upward or downward, and ensure that the bulb is not in your direct line of sight. You can also use bias lighting behind the TV to reduce contrast.
Advanced Tips
- When using plug-in track lighting, choose a track that allows you to attach spotlights and pendants. Adjust the heads to point at art, plants, or shelves to create visual interest without adding new outlets.
- Consider using a plug-in LED strip under a sofa or behind a television to add a subtle glow that enhances the ambient light. Use a remote-controlled dimmer to change the brightness and color for different moods.
- For a ceiling light that plugs in, look for a plug-in flush-mount fixture that is shallow enough to avoid hitting heads. Use a cord cover that runs along the ceiling to the wall outlet, and paint the cover to match the ceiling to make it less noticeable.
Final Checklist
- Verify that all lights are plugged into grounded outlets and that no cord is damaged or frayed.
- Confirm that the total wattage for each outlet circuit does not exceed the outlet's rating (typically 1800 watts).
- Ensure that every light can be turned off individually or as part of a group using accessible switches or smart controls.
- Take a final walkthrough at night to check for dark spots, glare, and pleasant light distribution, and adjust as needed.
FAQ
Can I use a smart plug to control any plug-in lamp?
Yes, most smart plugs work with any standard lamp as long as the lamp's plug fits into the smart plug and the smart plug fits into the outlet. Check the wattage rating of the smart plug (usually up to 15 amps) and ensure your lamp doesn't exceed it. Also, make sure your Wi-Fi network is available and you have a compatible app. If your smart plug uses Zigbee or Z-Wave, you'll need a hub.
How do I know if a plug-in pendant light is safe for my room?
Check the fixture's label for safety certifications (like a recognized testing laboratory mark). Ensure the cord is long enough to reach your outlet without stretching, and that the cord is not meant to be concealed inside walls. Install it securely following the manufacturer's instructions, and if the pendant is heavy, use a ceiling hook rated for its weight. If you're unsure, consult an electrician.
What is the best way to avoid buying too many lights?
Start by creating a lighting plan based on your activities. Use the rule of three: have one ambient light, one task light per activity area, and one accent light to highlight something. Before purchasing, make a list of each light's purpose and position. Buy only what you need, and test the layout with temporary lights (like a utility lamp) to see how it feels.